
For years, the only answer to quickly changing the magnification level on a Low Power Variable Optic (LPVO) has been to add a throw lever. I remember the days when the only “throw lever” available was an aftermarket ring with a lever that had to be tightened down over the magnification ring. It took a while for scope manufacturers to include an optional or non-removable throw lever as part of the scope design. Even with this advancement, the shooter still had to use their dominant or non-dominant hand to engage the lever and change the magnification level. That was when the original Scopeswitch from Antimatter Industries was released to solve this issue entirely.
I remember when the Scopeswitch was first announced, and there was a lot of buzz around it. A lot of my video gaming friends were excited about it, as it reminded them of how many games show a reticle with quick zoom-in and out options. As a competitive shooter, especially in the 3 Gun world, the ability to quickly zoom in or out on a scope without removing either hand from the rifle is valuable. It can save a lot of time and be more precise than jerking a throw lever quickly. I was recently sent the Scopeswitch 2.0 to review, and in this article, I’ll share what I learned from the installation process, what scopes are compatible, and my thoughts on the new unit.
Installing the Scopeswitch 2.0
Before unboxing the new Scopeswitch, I watched the installation video on YouTube. I also reviewed the Antimatter website’s “install” page, which suggested having a gunsmith mount it. I was a little intimidated after all of that, so I called in my friend, Garrett, to install it for me. I highly recommend watching the video in full first, then pausing it at each step if you plan to install it yourself. One thing I wanted to note is that I didn’t want to cut the cable or the cable cover because I don’t plan to permanently mount the Scopeswitch on just one rifle with one optic. Garrett did his best cable management job to leave the cable length as is so that I could try the Scopeswitch on various other optics.
Advertisement — Continue Reading Below
The Scopeswitch 2.0 needs to be installed with the shooter present or with markings (I used masking tape) of where to mount the slider and the scope itself. The first step is to set your eye relief for the scope to ensure you can see the reticle through maximum magnification when you’re behind your gun. Make sure your length of pull is also set, as it will affect how far the slider needs to be mounted. Once the scope is set where you want it, you will need to get behind the rifle and grip the gun as you normally would. I recommend marking the location where you naturally extend your arm and grip the handguard. This would be the maximum distance you would want to reach, and therefore be a natural place for the end of the slider.
Measure Twice, Cut Once
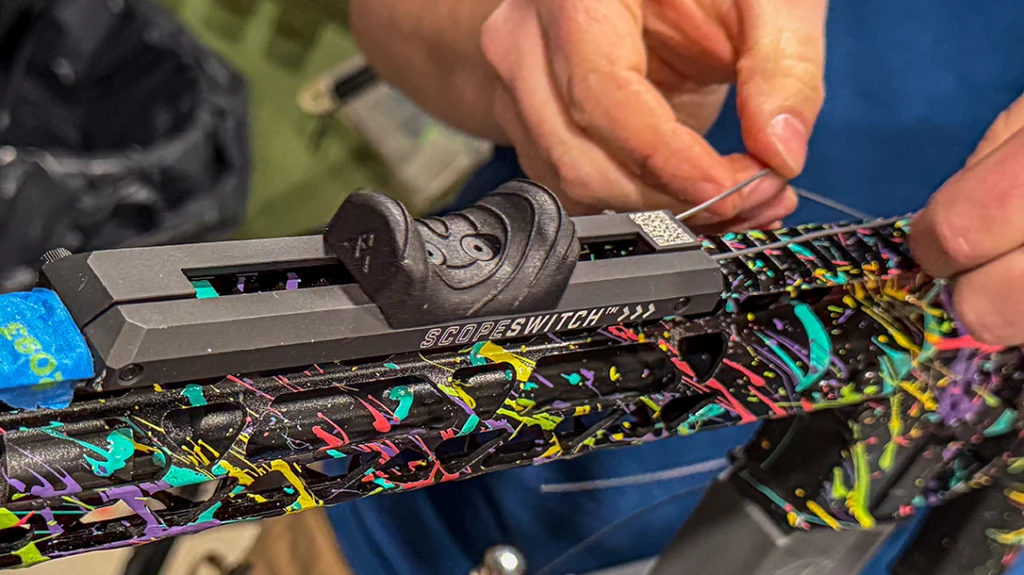
One thing I appreciated about the Scopeswitch 2.0 is that you can reverse the slider’s direction of travel, so it zooms in when you pull in or when you push out. I found it most intuitive to have the magnification level increase (zoom in) when I push the slider forward, so that is how I had it installed. I found it helpful to also read the FAQs on the website before installing, as this is where I found the information.
Advertisement — Continue Reading Below
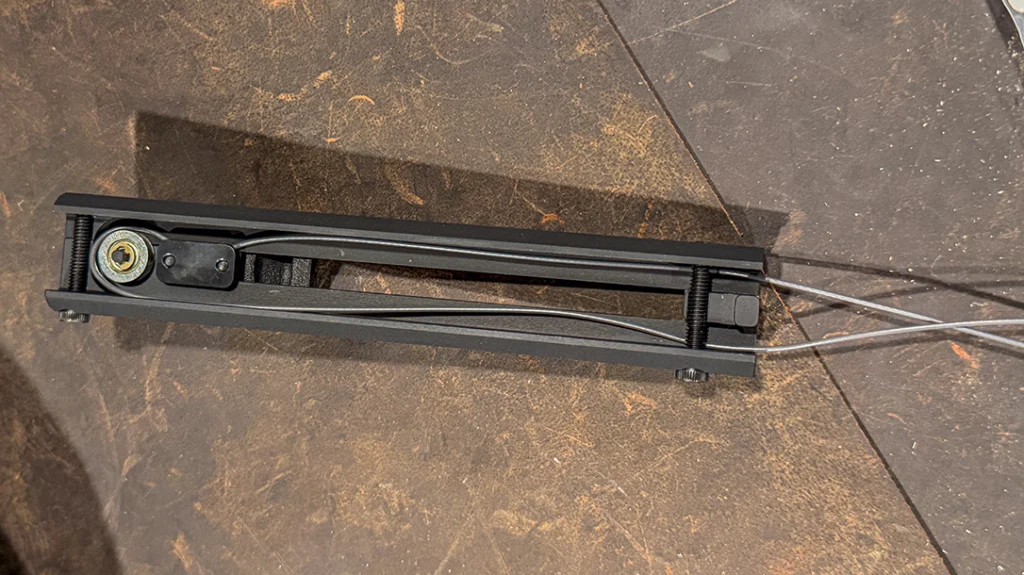
The final steps of the installation process include cutting the excess cable and cutting the cable cover. This is specific to your gun, scope, and slider location. Before making these final cuts, ensure everything is set up exactly how you want it. Antimatter mentions in the install video that they will send you a new cable if you mess up this step, but you’ll have to wait until it’s delivered before you can install your Scopeswitch.
Scopeswitch 2.0 Compatibility
The most important factor in whether the Scopeswitch performs as desired is choosing the right scope for it. Some scopes are not compatible with the Scopeswitch at all if they have a non-removable throw lever (like the Khales K16i and K18i) or a throw lever that is too wide (Trijicon Accupoint 1-4x). The Scopeswitch will also only be as smooth and easy to operate as the magnification ring on the scope. I have used dozens of LPVOs over the years, and I can tell you from experience that not all magnification rings are the same. Scopes that have “looser” magnification rings are going to be much easier to manipulate with the Scopeswitch versus scopes that come with a stiff magnification ring. I have physically sent in two scopes to customer service in the past to have them physically loosen the magnification ring to make it easier to manipulate.
Advertisement — Continue Reading Below
If you don’t have a scope selected yet for use with the Scopeswitch, I recommend checking out the compatibility chart Antimatter made for scopes they have tested with their product. Also, note that Scopeswitch 2.0 is only compatible with 30mm and 34mm tubes, as those are the two sizes available for purchase.
Maven Optics
I own a Maven Optics 1-10×28 FFP riflescope and noticed it wasn’t on the compatibility chart, so I wanted to test it out with the Scopeswitch to see if it would be compatible.
Advertisement — Continue Reading Below
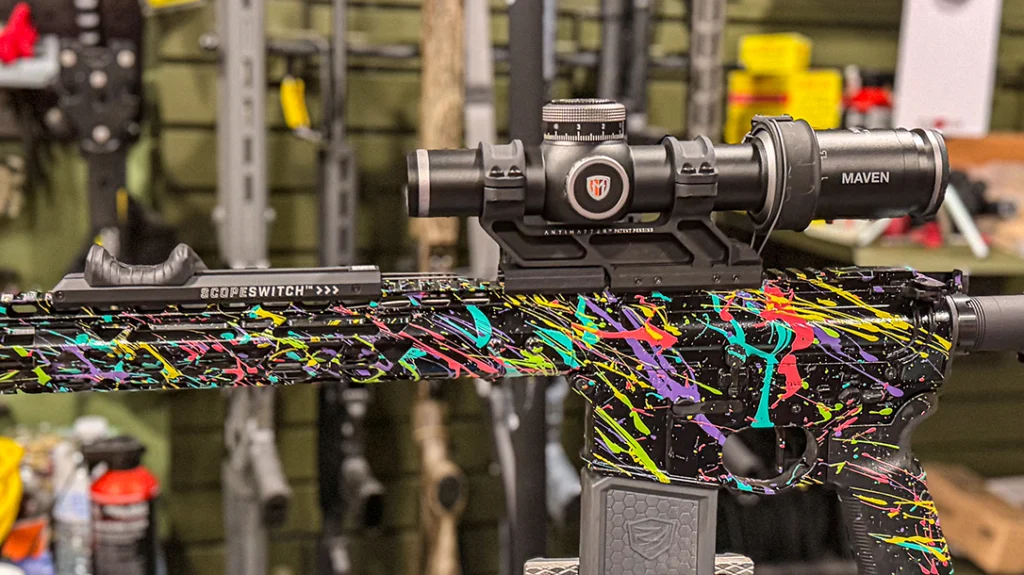
This scope is unique in that it has a tool-free locking elevation turret with a zero stop and second rotation indicator. If you dial elevation, this design is intuitive and fast. I also like the MIL (CFR2-LPI) reticle option, and that it illuminates in both green and red. I’ve never had an issue manipulating the magnification ring manually, but it was too stiff to use with the Scopeswitch 2.0. It took quite a bit of force to get the slider started with this scope, so I would say it’s not as compatible as the ones on the chart.
Pros & Cons
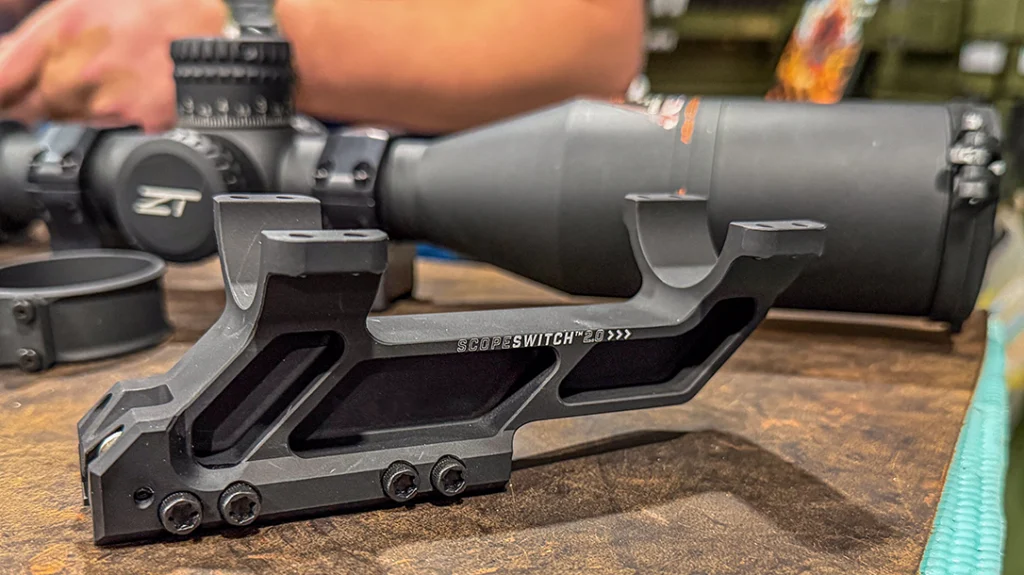
There are pros and cons to the Scopeswitch 2.0, and those pros/cons depend on the end user. You do need a rifle with a full Picatinny rail on the upper and handguard. You also need enough handguard space to mount the Scopeswitch, so AR pistols or short SBRs might not have a long enough handguard. If you use a light/laser pressure switch on top of your handguard, you might need to look into M-LOK button mounts or other options for mounting a switch on the side. Overall, I don’t think the weight makes a major difference, but it can be a factor for some people. The mount is 6.3 ounces, and the entire assembly is 10.5 ounces. Compared to similar scope mounts, this isn’t far off the industry norm.
Advertisement — Continue Reading Below
The biggest pro of the Scopeswitch 2.0 is the ability to zoom in and out quickly and without having to remove your dominant or non-dominant hand from the rifle. You can also keep looking through the scope while sliding the Scopeswitch to the exact magnification level you prefer, without removing your cheek weld and checking the magnification ring. In shooting competitions where speed is everything, we shooters typically pick a magnification level and make it work, even if it’s not ideal for close- or long-range targets. When we have to manually adjust the magnification level with our dominant or non-dominant hand, we lose time for that, and when we go to re-grip the rifle.
Big Plus Of Scopeswitch 2.0
One of the most useful benefits of the Scopeswitch 2.0 to me is being able to zoom out slightly when transitioning from one target to the next, then zoom in once I acquire the target. When I am using 8x or 10x magnification on an LPVO, that leaves very little field of view to find my next target. I often have to lift my head from my cheek weld, find the target with my naked eye, and then reposition the rifle in that direction.
Advertisement — Continue Reading Below
This eats up precious time I don’t have. Even worse than that is having to take a hand off the rifle to manually zoom in and out with a throw lever between targets. The Scopeswitch 2.0 makes it easy to quickly zoom out to find my next target through the scope and then just as easily zoom in without having to lift a hand or cheek off the rifle.
Final Thoughts
I think the Antimatter Scopeswitch 2.0 is a cool concept and practical. It takes some getting used to, but it becomes intuitive. The installation process is by far the most challenging aspect. Just be sure to pick a compatible scope and be ready to dedicate a rifle build to that said scope and the Scopeswitch 2.0.
WHY OUR ARTICLES/REVIEWS DO NOT HAVE AFFILIATE LINKS
Affiliate links create a financial incentive for writers to promote certain products, which can lead to biased recommendations. This blurs the line between genuine advice and marketing, reducing trust in the content.