

There are many different steel finishes to choose from, whether you are choosing your next firearm or looking to touch up the one you have. Blued steel never quite goes out of style, but not all blue is created equal. Hot blue is durable, but the process requires expensive equipment and emits harmful gas. Cold blue is safe and easy to do, but the finish does not hold up with use. Before these types of bluing, fire bluing, and charcoal bluing were common firearm finishes that are seldom used today. Here is how I do it:
Get That Classic Finish With Fire Bluing and Charcoal Bluing
Bluing is essentially a change in the surface of a steel part to protect the unprotected layer below from rust and corrosion. Although finishes have come a long way, bluing is the first process to do the job with success. The outer layer used in hot bluing is a chemical reaction between the bluing agent and the steel that results in a black oxide. Depending on the steel content itself, it can vary in color. Earlier bluing options are nothing more than imparting ordnance scale or a surface layer of fixed rust. As counterintuitive as it sounds, it is a rust to prevent more rusting.
Advertisement — Continue Reading Below
Where Does Blueing Come From
The first firearms were left in-the-white. In other words, the bare metal is polished and oiled. Military muskets were finished this way, and most entry-level civilian guns as well. The ordnance finish required diligent care in the field. Bluing and browning are more durable finishes but generally reserved for higher-end firearms. But by the mid-19th century, those finishes became standard. Fire bluing was common for small parts, but charcoal bluing became the de facto gun finish until large volume gas ovens were perfected at the turn of the 20th century. Fire bluing and charcoal bluing are seldom seen on new guns today, except on replicas of older designs. But that does not detract from their utility.
Fire Bluing: Best Practices
The process of fire bluing is just as simple as the name suggests. Heat the steel part with a heat source until it begins to turn blue. The heat creates a protective layer of flashover rust in a non-oxygen environment. Once the desired color is achieved, the heat source is removed and the part is left to cool. Finish with your favorite gun oil, and the part is ready to use.
Advertisement — Continue Reading Below
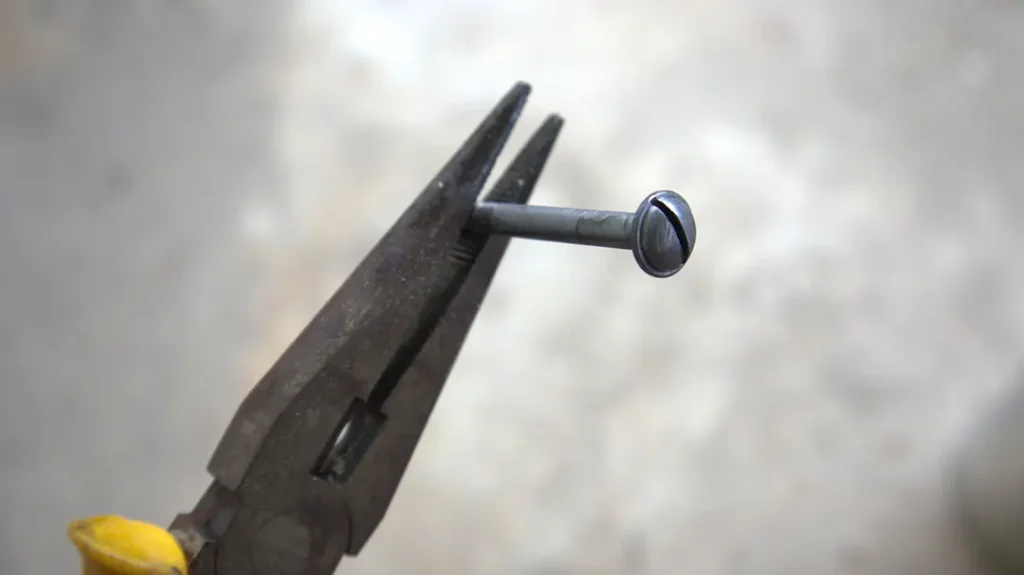
My preferred fire blue equipment is a simple propane torch, a pair of protective gloves, long-armed pliers, and a bucket of water. I control the part to be blued with the pair of pliers and guide it over the stationary torch. I run the part along its surface just outside the flame to heat the part slowly, surely, and evenly. If you heat the part up too quickly, it can result in a blotchy grey appearance. On the other hand, focusing the flame on one area of the part, like the head of a screw, will only blue that spot.
Tune Your Color
In any case, the steel will change color from straw-colored to violet, and finally to blue. You can stop at any point if you like the color. Once you have achieved the desired color, remove the flame and let it cool. You can elect to quench it. I use a bucket of water for cooling purposes, but many will use old motor oil. This adds nothing to the finish but allows you to skip the step of adding protective oil to the part afterwards.
Fire bluing is easy to do and can produce a beautiful and varied finish. But it is not to be used on all gun parts. Any part that requires work hardening should not be fire blued, as the temperature change can draw the hardness out of the part and leave it softer than it was forged. Action parts are off limits. But parts whose hardness is not vital to function are good candidates. Trigger guards, screws, outer lock plates, sling studs, magazines. Receivers and barrels, in theory, can also be fire blued, but it was rare historically. Charcoal bluing is more approachable, more durable, but more intensive.
Advertisement — Continue Reading Below
One Step Further: Charcoal Bluing
Fire bluing is easy to do, but the finish itself is not exceptionally durable, though more so than a lot of cold blues on the market. Charcoal bluing is one step above in durability and produces a blue-black finish that is associated with modern bluing. Essentially, a part is left to bake in a bed of charcoal until it achieves the desired color.
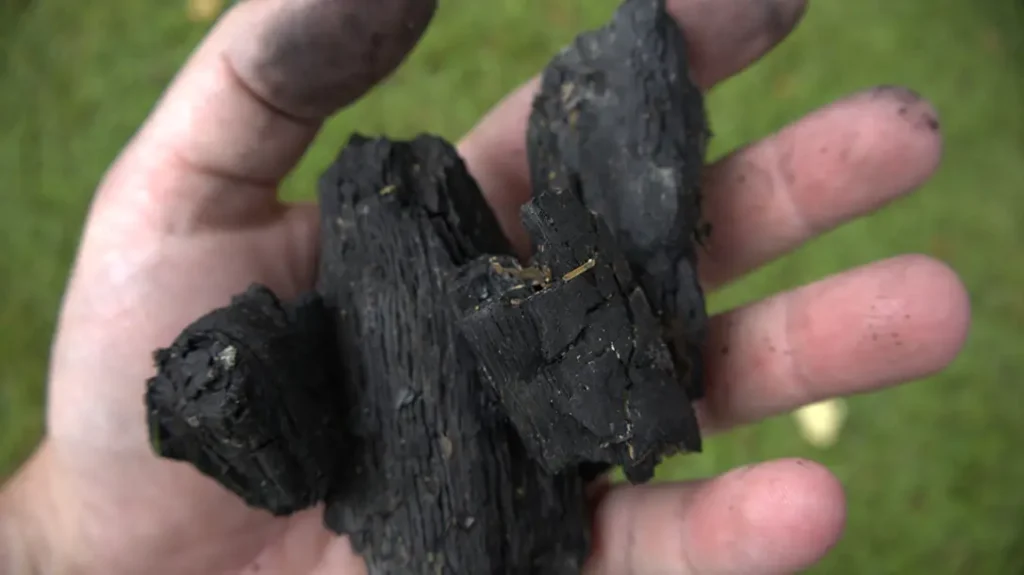
Charcoal bluing requires charcoal, a heat source, segregation equipment, burnishing supplies, and time. Small charcoal from a variety of hardwood and softwood can be used and can vary the color, as can adding other carbon compounds. Before going to gas furnace hot bluing operations, Colt charcoal blued their handguns with a mix of charcoal and bone bits. Large barbecue charcoal can work, but it should be made smaller. Some users recommend that the pea-sized, but you can get away with bigger. One absolute is that it needs to be dried out, or it can cause excessive spotting in the finish.
Advertisement — Continue Reading Below
Use a Furnace or Campfire
The heat source can range from an outdoor furnace to a campfire. It needs to be capable of reaching about 650 degrees Fahrenheit in order for the charcoal to cook and turn white. This cannot be attempted inside.
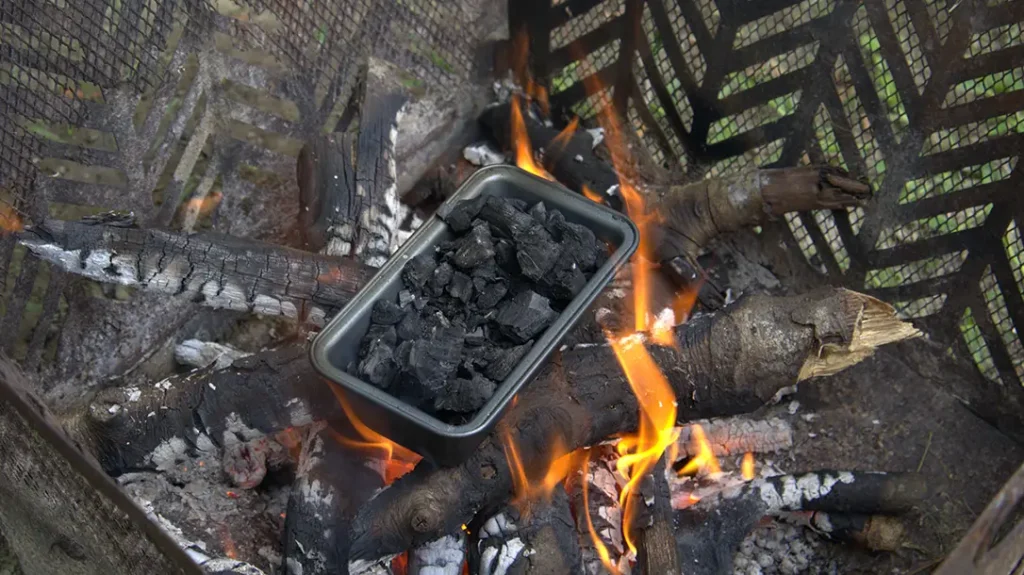
The process of bathing the parts intended for finishing has some flexibility. You don’t need the actual heat source on the part. Rather, the heat source will just cook the charcoal surrounding the part. In this oxygen-free environment, the scale that will be the finish will form on the steel. For longer items like barrels, sections of aluminum gutter can be used, while old bakeware can be used for polishing small parts.
Advertisement — Continue Reading Below
Before starting the process, it is important to have supplies for burnishing the metal parts. From time to time, the parts are pulled from their grave and, once cooled, are burnished with an abrasive to even out the scale and remove impurities. Traditional references include using burlap rags laced with brick dust or lye. Once burnished, the parts are given an even coating of oil and returned to the flames. In lieu of burlap and sperm whale oil, I like to use machine oil and 0000 steel wool.
Be Patient
The last part of the puzzle is time. Small parts can finish in one hour, but it can take a few hours and periodic burnishing to get the desired color. Add more time if spotting occurs. A spotted color indicates wet charcoal being used and too long between burnishing cycles. If that occurs and burnishing does not even it out, the part will have to be repolished, and the process started again.
Advertisement — Continue Reading Below
Case Study
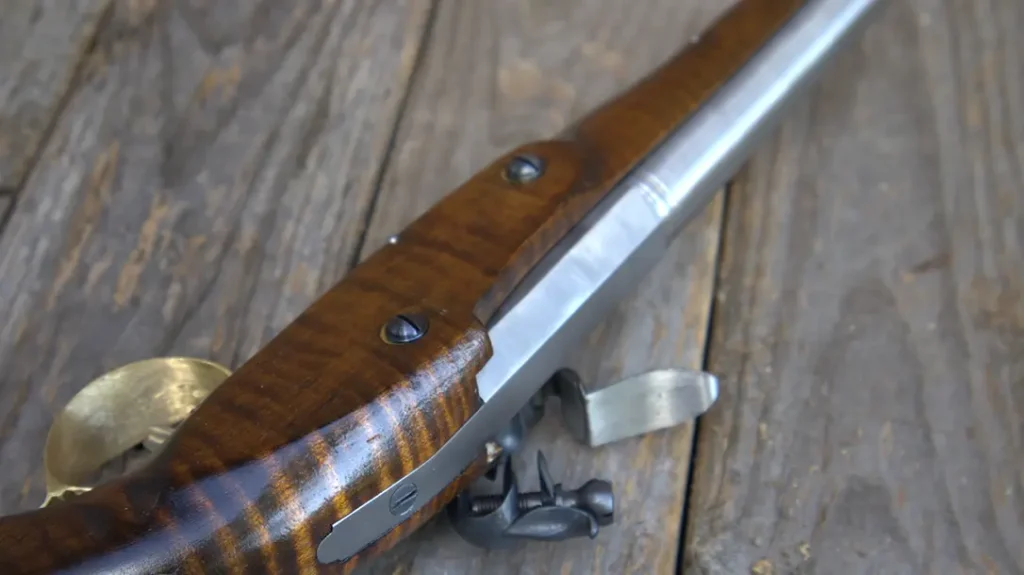
I used this flintlock build as a test case on fire bluing and charcoal bluing. I wanted a bright barrel, polished armory bright, fired screws and bolts, and a charcoal blued lock. Tempered parts like the lock tumbler and frizzen are finished separately, as heating them can make them lose their temper.
The lock and barrel bolts, machine screws, and wood screws are finished with a propane torch to a deep blue. Then they are quenched, dried, and finished with machine oil for installation.
The flintlock parts to be charcoal blued are stripped and polished to bare metal. No amount of finishing will erase file marks and sandpaper scratches. I then bury the parts in a small baking pan with a mix of birch and oak charcoal gathered from previous fires. The charcoal used is thumbnail-sized or smaller.
Fire Pit Heat Source
In frontier fashion, I turned to my fire pit for a heat source. Once the firewood had burned down sufficiently, I used tongs to break off new charcoal and add it to the pan. The pan is surrounded by charcoal but kept out of the direct flame. After forty-five minutes, I pulled the parts out, quenched them, and then went about burnishing with oil-soaked steel wool. Following reburying the parts, I add new charcoal. After another forty-five minutes, or whenever the charcoal starts to turn white, it is time to check again. The hammer was finished immediately and came out to a mild blue-black. It took two forty-five-minute cycles for the lock plate to finish.
Fire Bluing and Charcoal Bluing
There are many refinishing options out there, from polishing to browning to coating. If a blued finish is desired, fire bluing and charcoal bluing are two historical and attractive options that hold up better than store-bought cold blue, and it is simple to do right at home.


