
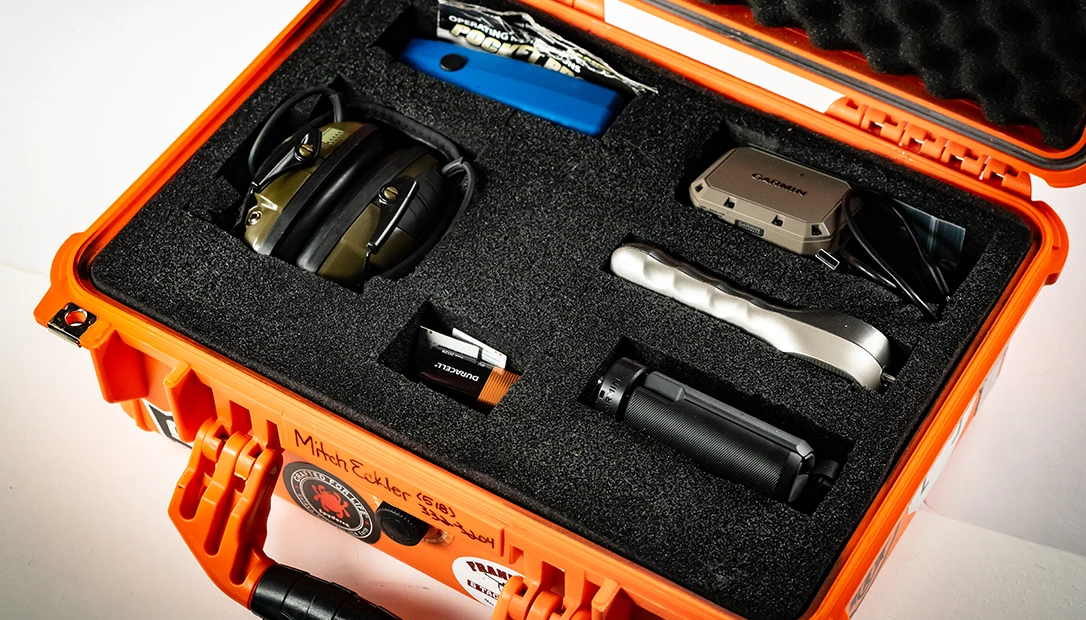
Packing up your gear and flying it to a location, loading valuables into a boat, or strapping mission-critical equipment to a pack animal to get where the adventure lives can be an adventure all by itself. As we move deeper into 2026, hard waterproof cases are more common than ever, and open-cell foam inserts have made it easier for home-gamers to create custom storage solutions right in their own shop.
Build DIY Road Cases
I have spent a large portion of my career living out of road cases. I started as a touring musician, stage manager, and technical director. Today, my world lives somewhere between photography, firearms, and outdoor video production. Through all of those transitions, one constant remained. If your cases fail, your day fails.
This editorial is not about perfection. It is about avoiding the common oversights and building cases that actually work when things get rough.
Advertisement — Continue Reading Below
Build Around Workflow
The best cases start in your brain long before a knife touches foam. One of the biggest oversights I see is people designing layouts around how foam looks instead of how gear is deployed. A case can look incredible on a workbench and still fail the moment you try to use it under pressure.
Workflow is everything. I constantly see lenses buried under lights or items that need to come out first sitting at the bottom of the stack. There are no universal rules, but there are common-sense patterns. If you are packing light, the stand for it should usually be the first to be accessible. Otherwise, you are standing there holding a light fixture and cable with nowhere to put them while you dig through separators to reach the bottom layer where all the stands live. Sometimes travel forces you to condense and compromise, but that decision should be intentional rather than accidental.
Advertisement — Continue Reading Below
I like to play a small mental game when designing a layout. I put one piece of gear on a table, along with all its support items, such as cables, clamps, and mounts. Then I pretend the floor is lava and there is no other flat surface available. Whatever I instinctively reach for first belongs closest to the top of the case. It sounds simple, but it reveals workflow problems quickly and can save your gear from a wet, muddy death.
Weight, Structure & Reality
Ignoring weight distribution is another oversight that shows up constantly. If you are building a large wheeled case, most of the weight should land where the wheels are. That sounds obvious until you start stacking layers and realize how easily heavy items migrate toward the wrong side of the shell.
Cases get dropped. They get bumped. They get stacked under heavier cargo. If hard items are mixed with delicate equipment, you need to think three-dimensionally about where the force of an impact travels. Weight should move in a controlled direction through the strongest parts of the case. When builders ignore this, lids flex, foam shifts, and expensive gear absorbs shock it was never meant to take.
Advertisement — Continue Reading Below
Overbuilding does not always mean adding more weight. It means reinforcing the areas that actually carry stress. Hinges and latches mounted to thin or unsupported panels might survive the first few trips. By trip twelve, you are standing in a parking lot holding a detached lid, wondering what went wrong.
Foam, Fitment & Heat
Something more common than most people want to admit is cutting everything too tight. Foam that crushes a laptop screen when the lid closes is not protective. It is a problem waiting to happen. Foam compresses over time and loses tension, so an overly tight fit rarely stays perfect anyway.
Advertisement — Continue Reading Below
Heat is the issue that catches people off guard. If you put a laptop to “sleep” and seal it into foam while it is still generating heat, that heat has nowhere to go. Open-cell foam traps warmth efficiently. In certain situations, it can build enough heat to damage electronics or worse. Ask me how I know. Leaving a small amount of breathing room around electronics is not sloppy work. It is good engineering.
I usually leave a thin buffer between items or wrap contact points with felt from a fabric store. That simple step prevents parts from grinding against each other during travel and helps avoid cosmetic wear that can turn into functional problems later.
Building for Trip 50
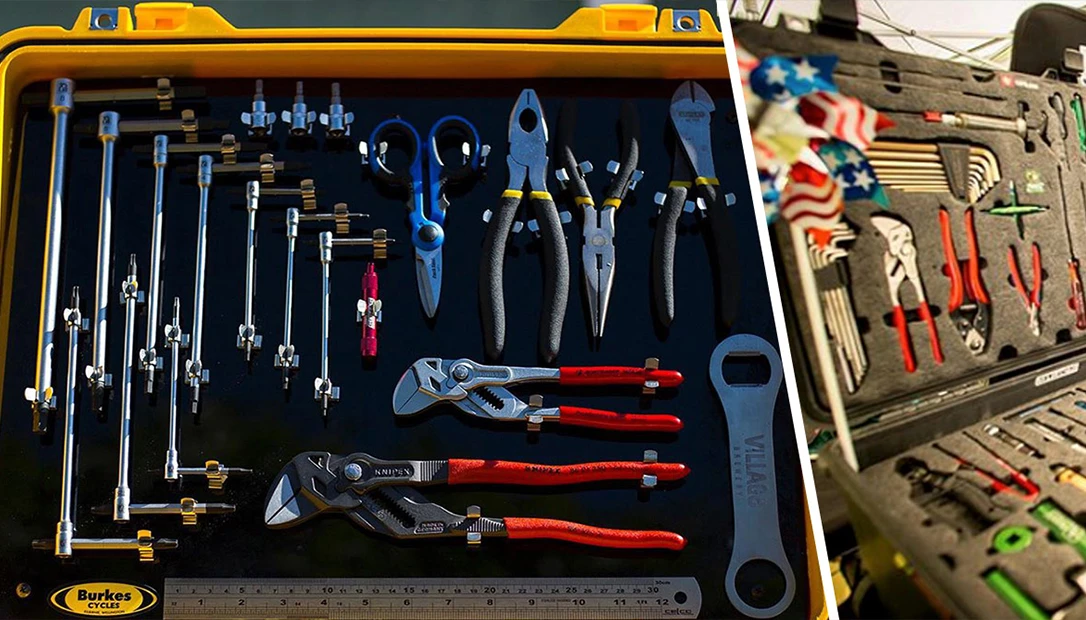
Complex cable systems benefit enormously from color coding or numerical labeling. If you arrive on location and need to delegate setup, helpers cannot assist if they cannot understand how the system goes together. I always tape a key or legend to the inside of the lid. Even future me appreciates that reminder from past me.
Advertisement — Continue Reading Below
Another major oversight is designing a case for one specific trip instead of the fiftieth. Builders often create layouts that fit a single configuration perfectly but leave no room for evolution. Gear changes. Accessories grow. Travel conditions shift. A good case anticipates change without forcing a full rebuild every time your kit evolves.
Lightweight materials and creative construction methods have made it easier than ever to build strong cases without adding unnecessary bulk. Strength should live where stress lives. The goal is reliability, not brute mass.
Advertisement — Continue Reading Below
My Go-To Recipe
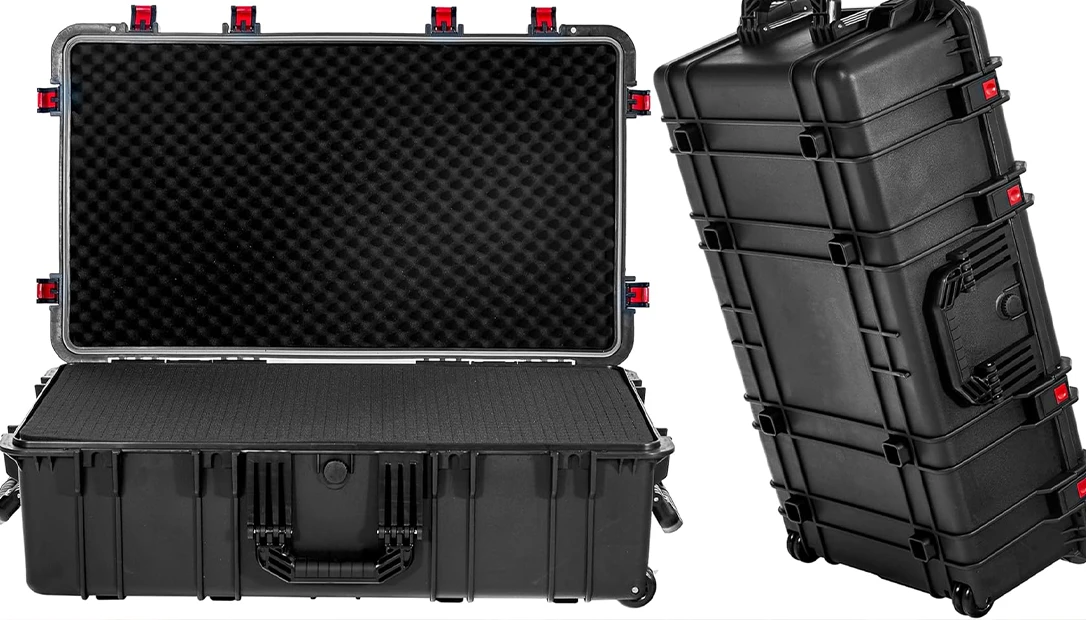
Harbor Freight cases have a mixed reputation, but they can be a solid starting point if used wisely. If I’m in rafting gear, I will opt for the top-tier brand every time. They are not the lightest option available, yet they offer a very cost-effective platform that can be customized heavily.
One trick that saves time is shopping for foam inserts before you buy the case itself. Etsy and eBay are full of builders producing inserts designed for common Harbor Freight models and other widely available shells. Matching an insert to a model number can save hours of work and often looks cleaner than a first attempt with pluck foam.
Another advantage is that foam inserts are replaceable. When you upgrade gear, the case does not become useless. Swapping the insert lets you repurpose a shell instead of starting from scratch.
When I begin laying out a build, I start by identifying what truly needs to go. Not what is fun to have or nice to carry, but what is essential. Once those items are organized, I examine the infrastructure that supports them. Power, cables, mounting hardware, and deployment order matter just as much as the primary equipment itself.
A grease pencil is my favorite tool for marking cut lines. It allows me to sketch, erase, and rethink placements without committing too early. Pluck foam can work, but I often prefer a long utility blade (OLFA) or even a large kitchen knife for clean, straight cuts through multiple layers. Purposeful cuts last longer than torn cells.
3M spray adhesive is incredibly useful for securing liners or bonding foam layers together so they do not shift during travel. Removing it later can take patience, but the stability it provides on the road is worth the effort.
Strengthening Foam with Plasti Dip
One of the biggest pain points of DIY road cases is the way pluck foam begins to disintegrate after repeated use. There is a simple hack that has saved many of my builds. After cutting and placing every object, I apply several coats of Plasti Dip to the exposed foam surfaces.
Plasti Dip is a flexible, rubberized coating that’s typically sprayed or brushed onto surfaces to add grip, protection, or a temporary finish. Once cured, it forms a durable layer that resists moisture, abrasion, and minor impacts.
When sprayed onto foam, it helps bind individual cells together and reduces pilling that occurs after heavy travel. I usually let the case sit outside in the sun for a while to encourage curing, though I keep an eye on it to avoid overheating. One thing to remember is that Plasti Dip contracts as it dries. If you are working with critical dimensions, account for that shift before committing to a final coat.
Closing the Case
There are countless solutions on the market for protecting your gear, but building your own road cases teaches you something valuable about how you work. A well-built case is not just storage. It is a system that supports speed, organization, and confidence when you arrive on location.
DIY road cases pay dividends over time. They reduce stress, protect investments, and make every trip feel more controlled. If these ideas save you a little time in your shop or help you avoid one expensive mistake, then the effort was worth it.
Travel safely and take care of your gear.